
之前在這篇有教學如何在底部做一個浮動按鈕
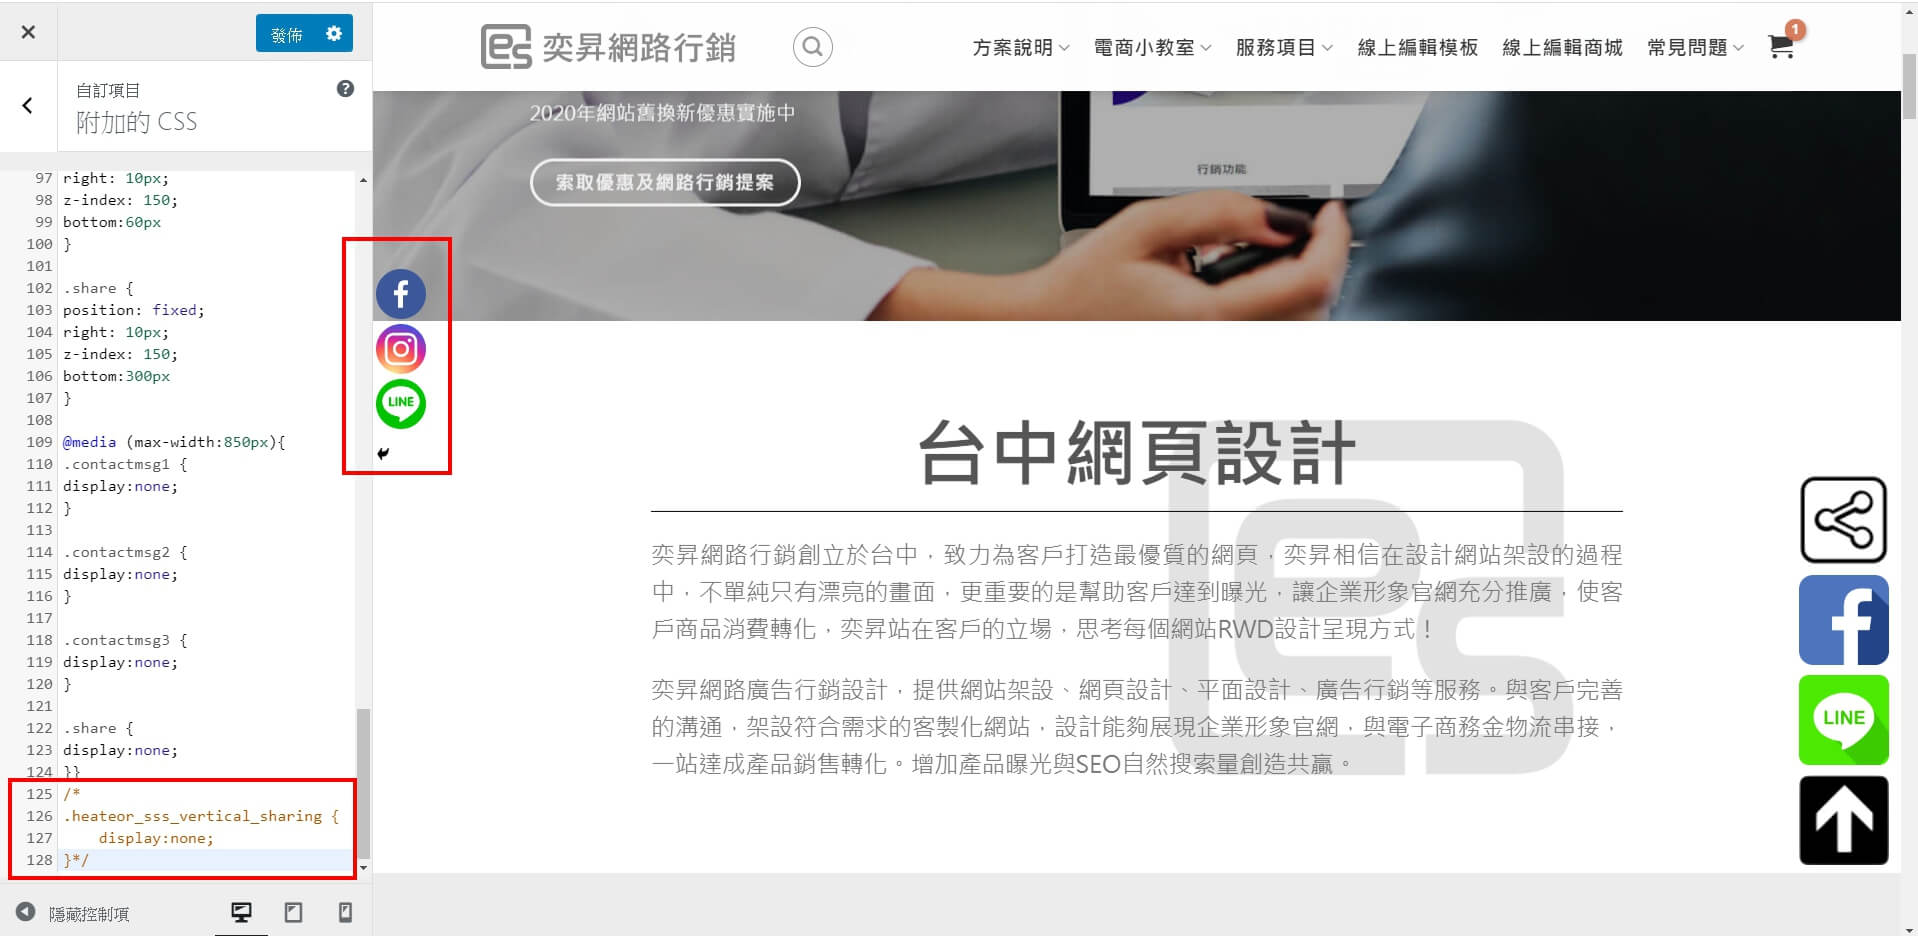
這次是除了浮動按鈕 回到頂層按鈕 再加上一個分享按鈕
不過分享的功能是借助Sassy Social Share這個外掛
他的Floating Interface要打開 之後再靠CSS隱藏
要是Floating Interface沒開啟 或是外掛停用 就無法使用了
先上四種按鈕的HTML 按照順序是 分享 FB LINE 回到頂層
<div class="share" onclick="heateorSssMoreSharingPopup(this, 'https://marketing.yis.tw/', '', '' )">
<img src="https://marketing.yis.tw/wp-content/uploads/share.png"  width="50px" title="社群分享"></a>
</div>

<div class="contactmsg1">
<a href="https://m.me/marketing.yis.tw" target="_blank"><img src="https://marketing.yis.tw/wp-content/uploads/icon_facebook_亮.png" width="50px" title="使用FB聯繫我們"></a>
</div>

<div class="contactmsg2">
<a href="https://t.yis.tw/lineme" target="_blank"><img src="https://marketing.yis.tw/wp-content/uploads/icon_line_亮.png"  width="50px" title="使用LINE聯繫我們"></a>
</div>

<div class="contactmsg3" id="top-link">
<a href="#top"><img src="https://marketing.yis.tw/wp-content/uploads/icon_up_亮.png"  width="50px" title="回到頂層"></a>
</div>
比較特別的是第一個 跟 第四個
第一個:分享按鈕的onclick就是利用Sassy Social Share外掛的分享功能
把他的onclick拿來使用
第四個:回到頂層按鈕 他有一個id
這是flatsome回到頂層所使用的id
我們也是拿來用 就能夠使用自己喜歡的圖片
做出回到頂層的樣子
再來是CSS
.share {
position: fixed;
right: 5px;
z-index: 150;
bottom:210px
}

.contactmsg1 {
position: fixed;
right: 5px;
z-index: 150;
bottom:150px
}

.contactmsg2 {
position: fixed;
right: 5px;
z-index: 150;
bottom:90px
}

.contactmsg3 {
position: fixed;
right: 5px;
z-index: 150;
bottom:30px
}

@media (max-width:850px){
.contactmsg1 {
display:none;
}

.contactmsg2 {
display:none;
}

.contactmsg3 {
display:none;
}

.share {
display:none;
}}
前面四個都是按鈕的位置設定
然後@media (max-width:850px)包裹的
是指在850px的情況下 按鈕會消失
也就是讓手機看不到這些按鈕
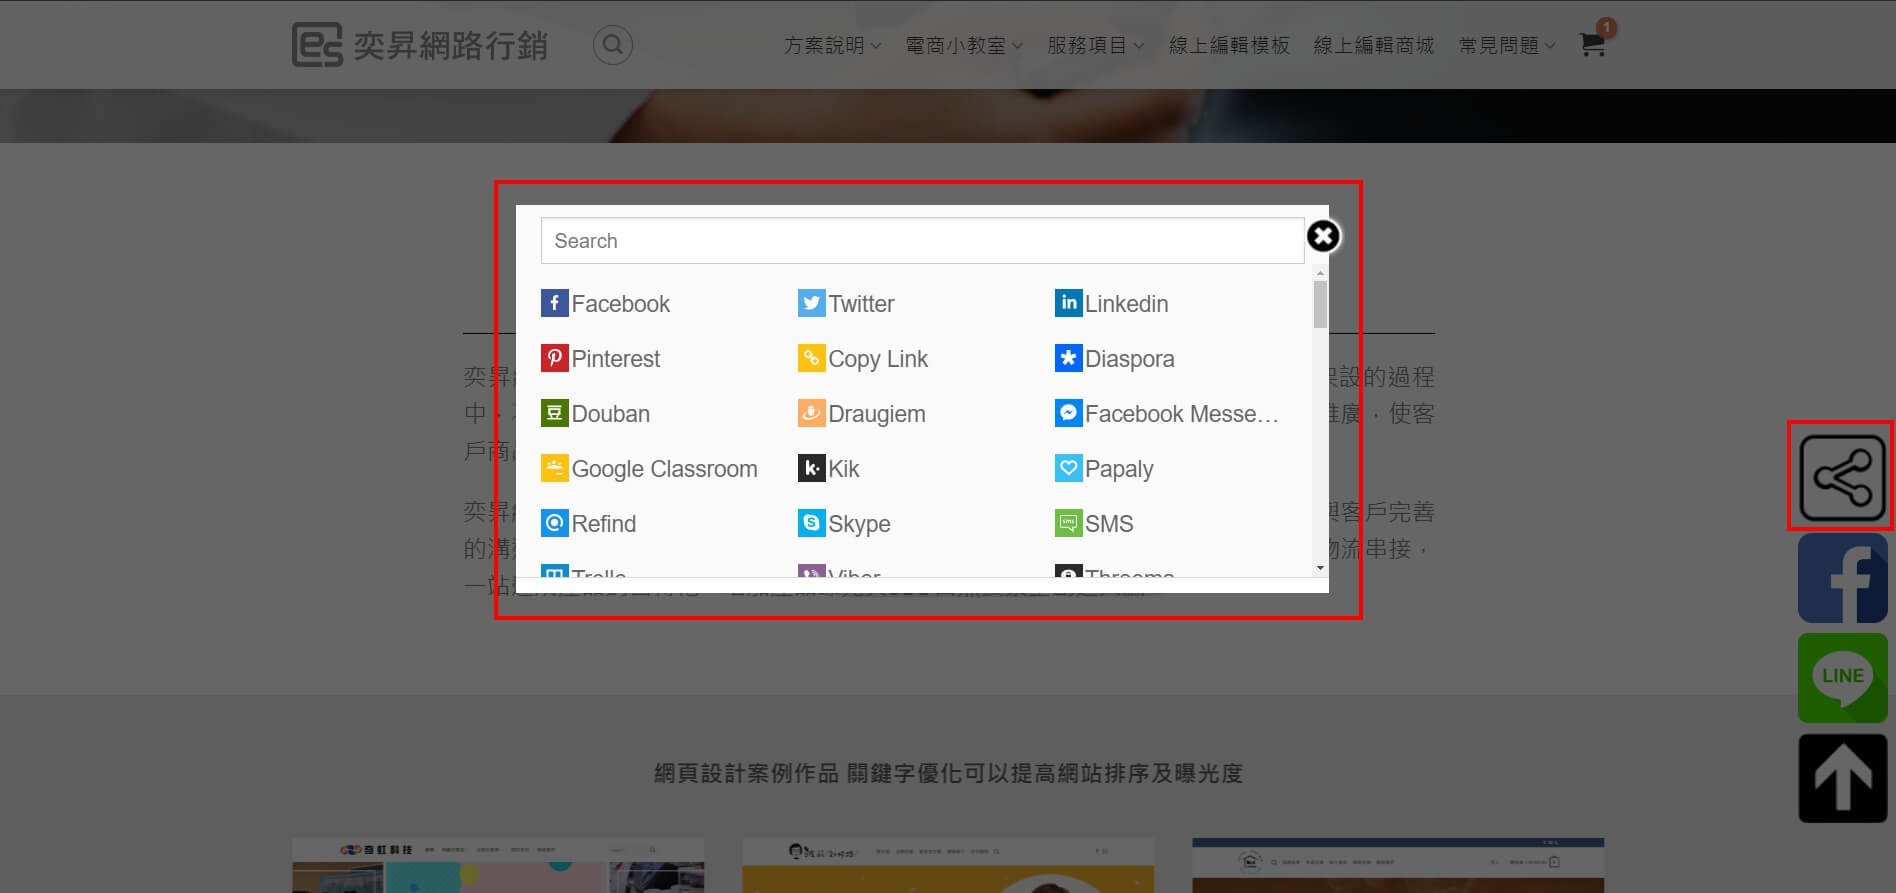
再來下面是隱藏Sassy Social Share的CSS
若沒有加上下面的CSS會變成這樣
.heateor_sss_vertical_sharing {
    display:none;
}